This time we’re learning how to create a dynamic website with Flask! The purpose of our website is to create a database of messages to which people can submit, along with a page to view submitted messages. The GitHub repository can be found here.
The bulk of our code is found in the app.py file. We have some standard Flask imports, and we also create a Flask instance:
from flask import Flask
from flask import render_template, abort, redirect, url_for
from flask import request
from flask import g
import sqlite3

app = Flask(__name__)
Enabling Submissions
Before we allow people to submit messages, we need to first create a database that will hold their messages.
def get_message_db():
    try: #returns database if it exists
        return g.message_db
    except: #otherwise creates and returns
        g.message_db = sqlite3.connect("messages_db.sqlite")
        cmd = "CREATE TABLE IF NOT EXISTS messages \
        (id INT, handle TEXT, message TEXT)"
        cursor = g.message_db.cursor()
        cursor.execute(cmd)
        return g.message_db
The Flask.g global variable we imported earlier is designed to store data across the context of the application; in this case, our database. The get_message_db() function, when called for the first time, will create a SQL database for our messages using the query CREATE TABLE IF NOT EXISTS messages (id INT, handle TEXT, message TEXT). This creates a messages database with columns id, handle, and message. On successive calls the function simply returns the database. This prevents the database from being recreated every time we try to access it.
Next, we define insert_message():
def insert_message(request):
    #extract form data
    message = request.form["message"]
    handle = request.form["handle"]

    with get_message_db() as db:
        #assigns message ID in order of submission
        cursor = db.cursor()
        cursor.execute("SELECT COUNT(*) FROM messages")

        message_id = cursor.fetchone()[0] + 1

        #inserts message into database
        cmd = f"INSERT INTO messages (id,handle,message) \
        VALUES ({message_id},'{handle}','{message}')"
        cursor.execute(cmd)

        db.commit()
When passed a request, it extracts form data from the request using request.form[<form id>] and inserts it into our database. We also define an ID for each message that helps distinguish them in the case that the same user submits the same message multiple times. The ID is assigned incrementally in chronological order, that is, the nth message has ID n. This is accomplished by using SELECT COUNT(*) FROM messages to count how many messages are already in the database. We also execute INSERT INTO messages (id,handle,message) VALUES ({message_id},'{handle}','{message}'), which adds a row to the database with the provided entries. Finally, when we update a SQL database, we have to commit our changes using commit().
Now that we have some helper functions, it’s time to actually render our page.
@app.route("/",methods=["POST","GET"])
def main():
    #submission page
    if request.method == "GET":
        return render_template("submit.html",submit=False)
    else:
        #if page refresh after submission, inserts message into db and displays thank you message
        insert_message(request)
        return render_template("submit.html",submit=True)
There’s a lot to unpack here. The first line tells us that the main() function will render the base page where the URL has no suffix, and that the page may be accessed by “GET,” which is the standard method (think refreshing or being redirected), or by “POST,” which occurs when a form on the page is submitted.
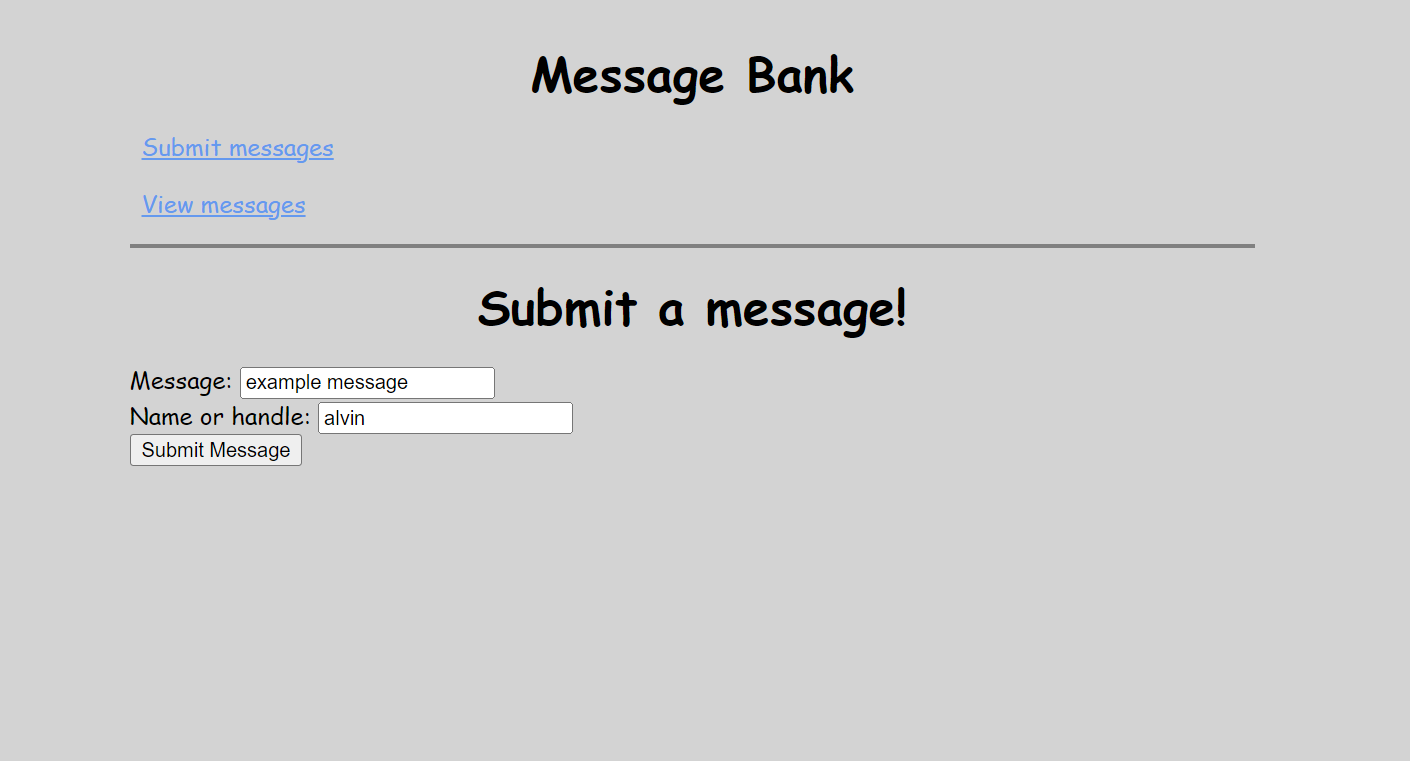
In either case we render our standard submit.html template using render_template(), but if the method is “POST,” then we call insert_message(request) to insert the submission into our database. Let’s take a look at submit.html.
{% extends "base.html" %}

{% block header2 %}
  <h1>Submit a message!</h1>
{% endblock %}

{% block content %}
  <form method="post">
      <label for="message">Message: </label>
      <input type="text" name="message" id="message">
      <br>
      <label for="handle">Name or handle: </label>
      <input type="text" name="handle" id="handle">
      <br>
      <input type="submit" value="Submit Message">
  </form>

    {% if submit %}
        <p>Thank you for your submission!</p>
    {% endif %}
{% endblock %}
And here’s how it renders:
The template inherits from base.html and uses some CSS to spruce things up a bit, neither of which we’ll go into detail about, but all of the relevant files are contained in the GitHub repository. For example, though, we can immediately see in our screencap a gray background and Comic Sans font, neither of which are standard. This is accomplished with the following blocks in our CSS file:
html {
    font-family: cursive;
    background: lightgray;
    padding: 1rem;
}

h1 {
    color: Black;
    font-family: cursive;
    margin: 1rem 0;
    text-align: center;
}
The submit.html file itself has two blocks: a second header that tells the user to submit a message, and a contents block which contains the form. We have two submission boxes with id message and handle, respectively, which means that upon submission the request will have attributes request.form["message"] and request.form["handle"], which contain the submitted text.
You’ll notice that when we called render_template() with submit.html, we also passed in a boolean submit based on if the page access method was “GET” or “POST”. In the template itself, there is a Jinja block that outputs a thank you message if submit is true, i.e. whenever the user submits a message.
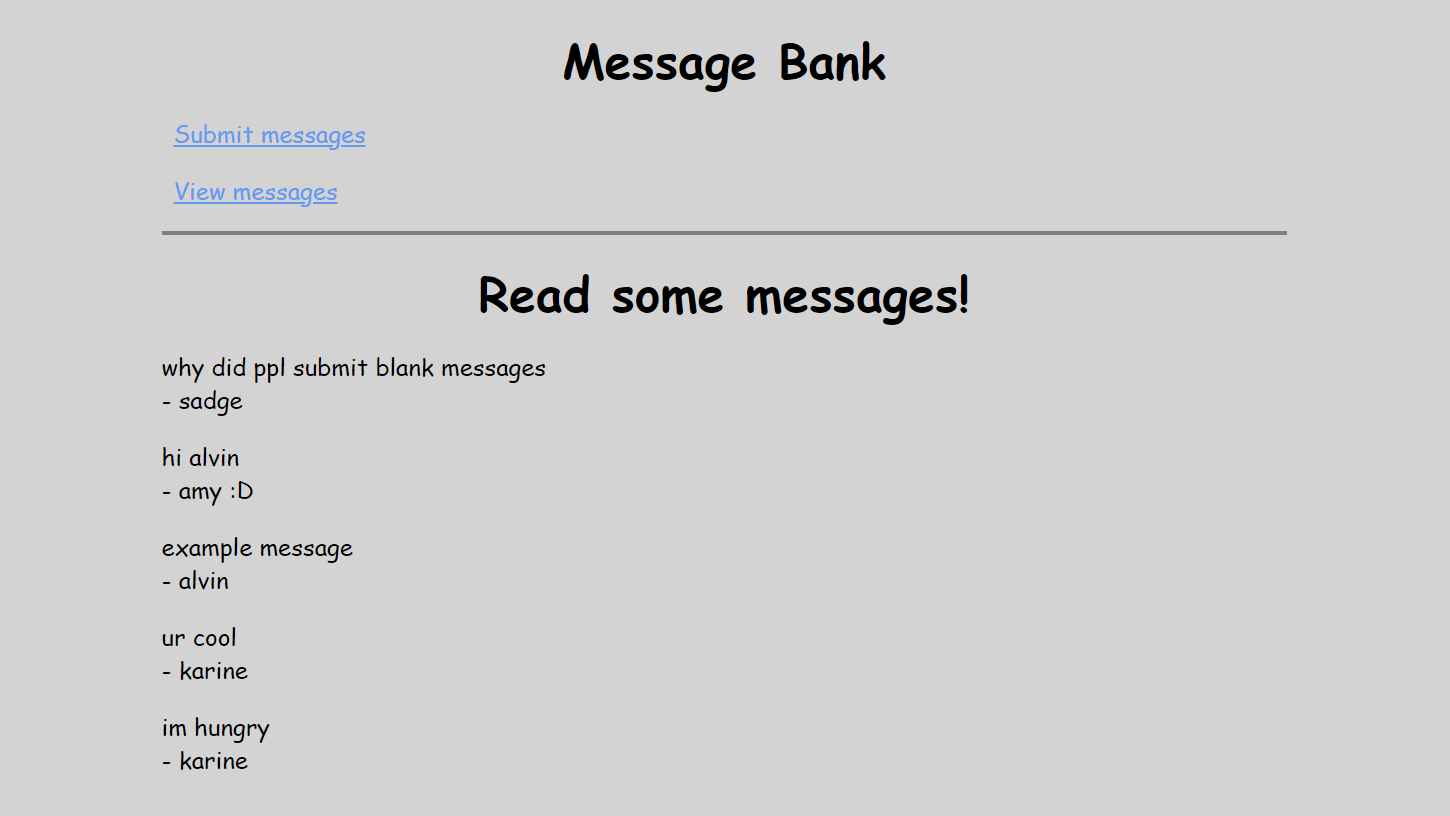
Viewing Submissions
For the purpose of this website we’ll only be displaying five messages at a time. The five messages are randomly selected from our database through the random_messages() function:
def random_messages(n):
    with get_message_db() as db:
        #randomly orders database and fetches first n rows
        #effectively fetches n random rows
        cursor = db.cursor()
        cursor.execute("SELECT handle,message FROM messages \
        ORDER BY RANDOM() LIMIT " + str(n))
        messages = cursor.fetchall()

    return messages
Strictly speaking, the query randomly orders the database and fetches the first n rows, but this is equivalent to fetching n random rows. As an aside, we used it in insert_messages() as well, but the block
with get_message as db:automatically handles opening and closing the SQL database connection for us.
Anyways, random_messages() is called when we render the /view/ page of our website using the following function:
@app.route("/view/")
def view():
    #view page
    to_display = random_messages(5)
    return render_template("view.html",messages=to_display)
Like with main(), the @app.route line indicates which page for which view() is meant to be called. When called, it renders view.html and passes in a list of random messages to be displayed.
We won’t deeply discuss the view.html template, but like submit.html, it inherits from base.html, hence has those navigation links we saw earlier when rendered. Here’s what that looks like, including the message we submitted earlier.